Quick Start
The WebAP plugin is designed with a Plug-and-Play approach. No need to write code or add managers to your startup scenes — the system initializes automatically.
1. Enable the Plugin
- Navigate to Edit -> Project Settings -> Adaptive Performance (Web).
- Toggle Enable Web Adaptive Performance.
- Expand the Scalers tab and enable additional modules (e.g., Physics Step or Shadows Quality) that best suit your game's specifics (see Scalers Reference for details).
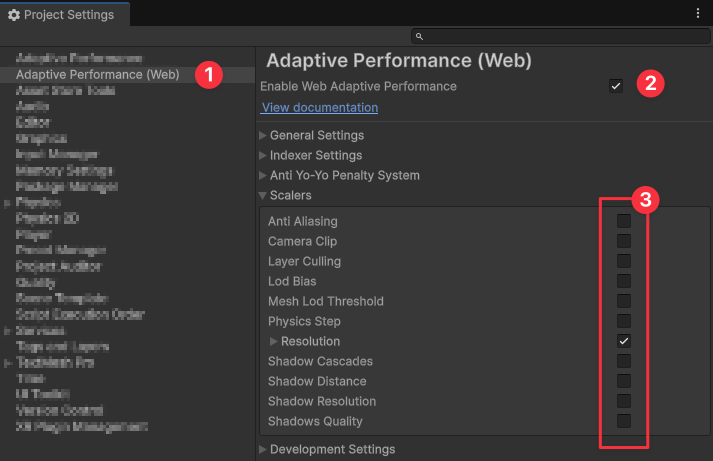
Default Settings
The default settings are pre-configured for optimal performance in most projects. Leave them unchanged.
2. Configure Player Settings
To allow the plugin's Tracker to mathematically distinguish processor (CPU) lag from graphics (GPU) lag, it requires access to precise hardware frame timings.
Frame Timing Stats
Navigate to Edit -> Project Settings -> Player -> Other Settings -> Rendering and check Frame Timing Stats. Without this setting, Bottleneck detection will not function.
3. Configure Graphics
Stop creating separate quality presets (Low, Medium, High) for different devices and forcing players to choose manually.
Maximize Graphics Quality
Configure your project for maximum quality. For BiRP, do this in Project Settings -> Quality, and for URP — inside your URP Asset. If the player's device lacks the Performance Headroom, the plugin will smoothly scale down the load automatically, utilizing only the Scalers you have enabled.